How to Set Up Vibe Testing on Every Pull Request: A Step-by-Step Guide

TL;DR
You can add agent-driven E2E testing to your repository in under two minutes by dropping one GitHub Actions workflow file into .github/workflows/. Once it is in, every PR triggers an AI agent that reads the diff, generates targeted end-to-end tests, runs them on real browsers, and posts results back as a GitHub check. No Playwright scripts, no Cypress maintenance, no QA bottleneck. This guide walks through the exact setup, what each stage does, and how to verify it is working.
Every team that adopted vibe coding eventually hits the same wall: code ships faster, but validation does not keep up. This post is the implementation manual for closing that gap on every pull request.
What is Vibe Testing in one line?
Vibe Testing is the practice of letting an AI agent generate, run, and maintain end-to-end tests on every code change — so no human writes or maintains test scripts. It is the testing-side mirror of vibe coding.
This guide is the how-to. If you want the concept piece first, start with What is Vibe Testing and come back here.
What you need before you start
The setup assumes a fairly standard modern stack. You need:
That is it. No Playwright installation. No Cypress config. No browser binaries to manage.
Step 1: Get your DevAssure token
Inside your DevAssure account, generate an API token from the settings panel. Copy it.
In your GitHub repo, go to Settings → Secrets and variables → Actions → New repository secret and add:
- Name:
DEVASSURE_TOKEN - Value: the token you just copied
This is the only credential the workflow needs. The agent uses it to authenticate the test runs and post results back to your PRs.
Step 2: Add the workflow file
Create a new file at .github/workflows/devassure.yml with this content:
name: DevAssure O2

on:
  pull_request:
    branches: [main]

jobs:
  test:
    runs-on: ubuntu-latest
    steps:
      - uses: actions/checkout@v4
        with:
          fetch-depth: 0
      - uses: devassure-ai/devassure-action@v1
        env:
          DEVASSURE_TOKEN: ${{ secrets.DEVASSURE_TOKEN }}
Three details matter here:
Commit and push the file. The workflow is now live.
For a deeper dive on Actions architecture, see GitHub Actions and DevAssure O2 on GitHub Marketplace.
Step 3: Open a test pull request
Make any code change — a UI tweak, a new endpoint, a refactor — and open a PR. Within a few seconds you will see the DevAssure O2 check appear on the PR alongside your other status checks.
Behind that check, five things are happening:
Stage 1: The agent reads your diff
The agent parses the branch comparison to identify what actually changed — not just files, but functions and their downstream dependencies.
diff: feature/checkout → main
changed_files: 18
context_built: 130 lines analyzed
+ discount logic rewritten
- old_discount_calc() removed
Stage 2: The agent maps the blast radius
Instead of running an exhaustive suite, it traces the change to the specific user flows most likely to be affected.
impact_analysis:
process_order
├── checkout    AFFECTED
├── inventory   WATCH
└── email       SAFE
affected_flows: 9
This is why Vibe Testing is fast — coverage is scoped to the impact area, not the entire app. See the O2 testing agent for more on how blast radius is computed.
Stage 3: The agent generates the tests
Targeted E2E scenarios are written in plain-English YAML. No selectors, no page objects.
summary: Checkout with discount
priority: P0
steps:
  - add item to cart
  - apply promo code SAVE20
  - verify discount applied
  - complete checkout
tags: [checkout, discount]
Stage 4: The tests execute on real browsers
Headless Chrome inside the CI runner. If a selector drifts because the UI shifted, the agent re-resolves the element semantically — there is nothing brittle to break.
session_id: da_8f2a1c9b
browser: chrome-headless
tests_run: 27
passed: 26
failed: 1

✗ P0 Bug: test_payment_retry_flow
→ Discount not applied on retry
Stage 5: Results post back to the PR
A GitHub check with pass/fail counts, screenshots of failures, and full session replays.
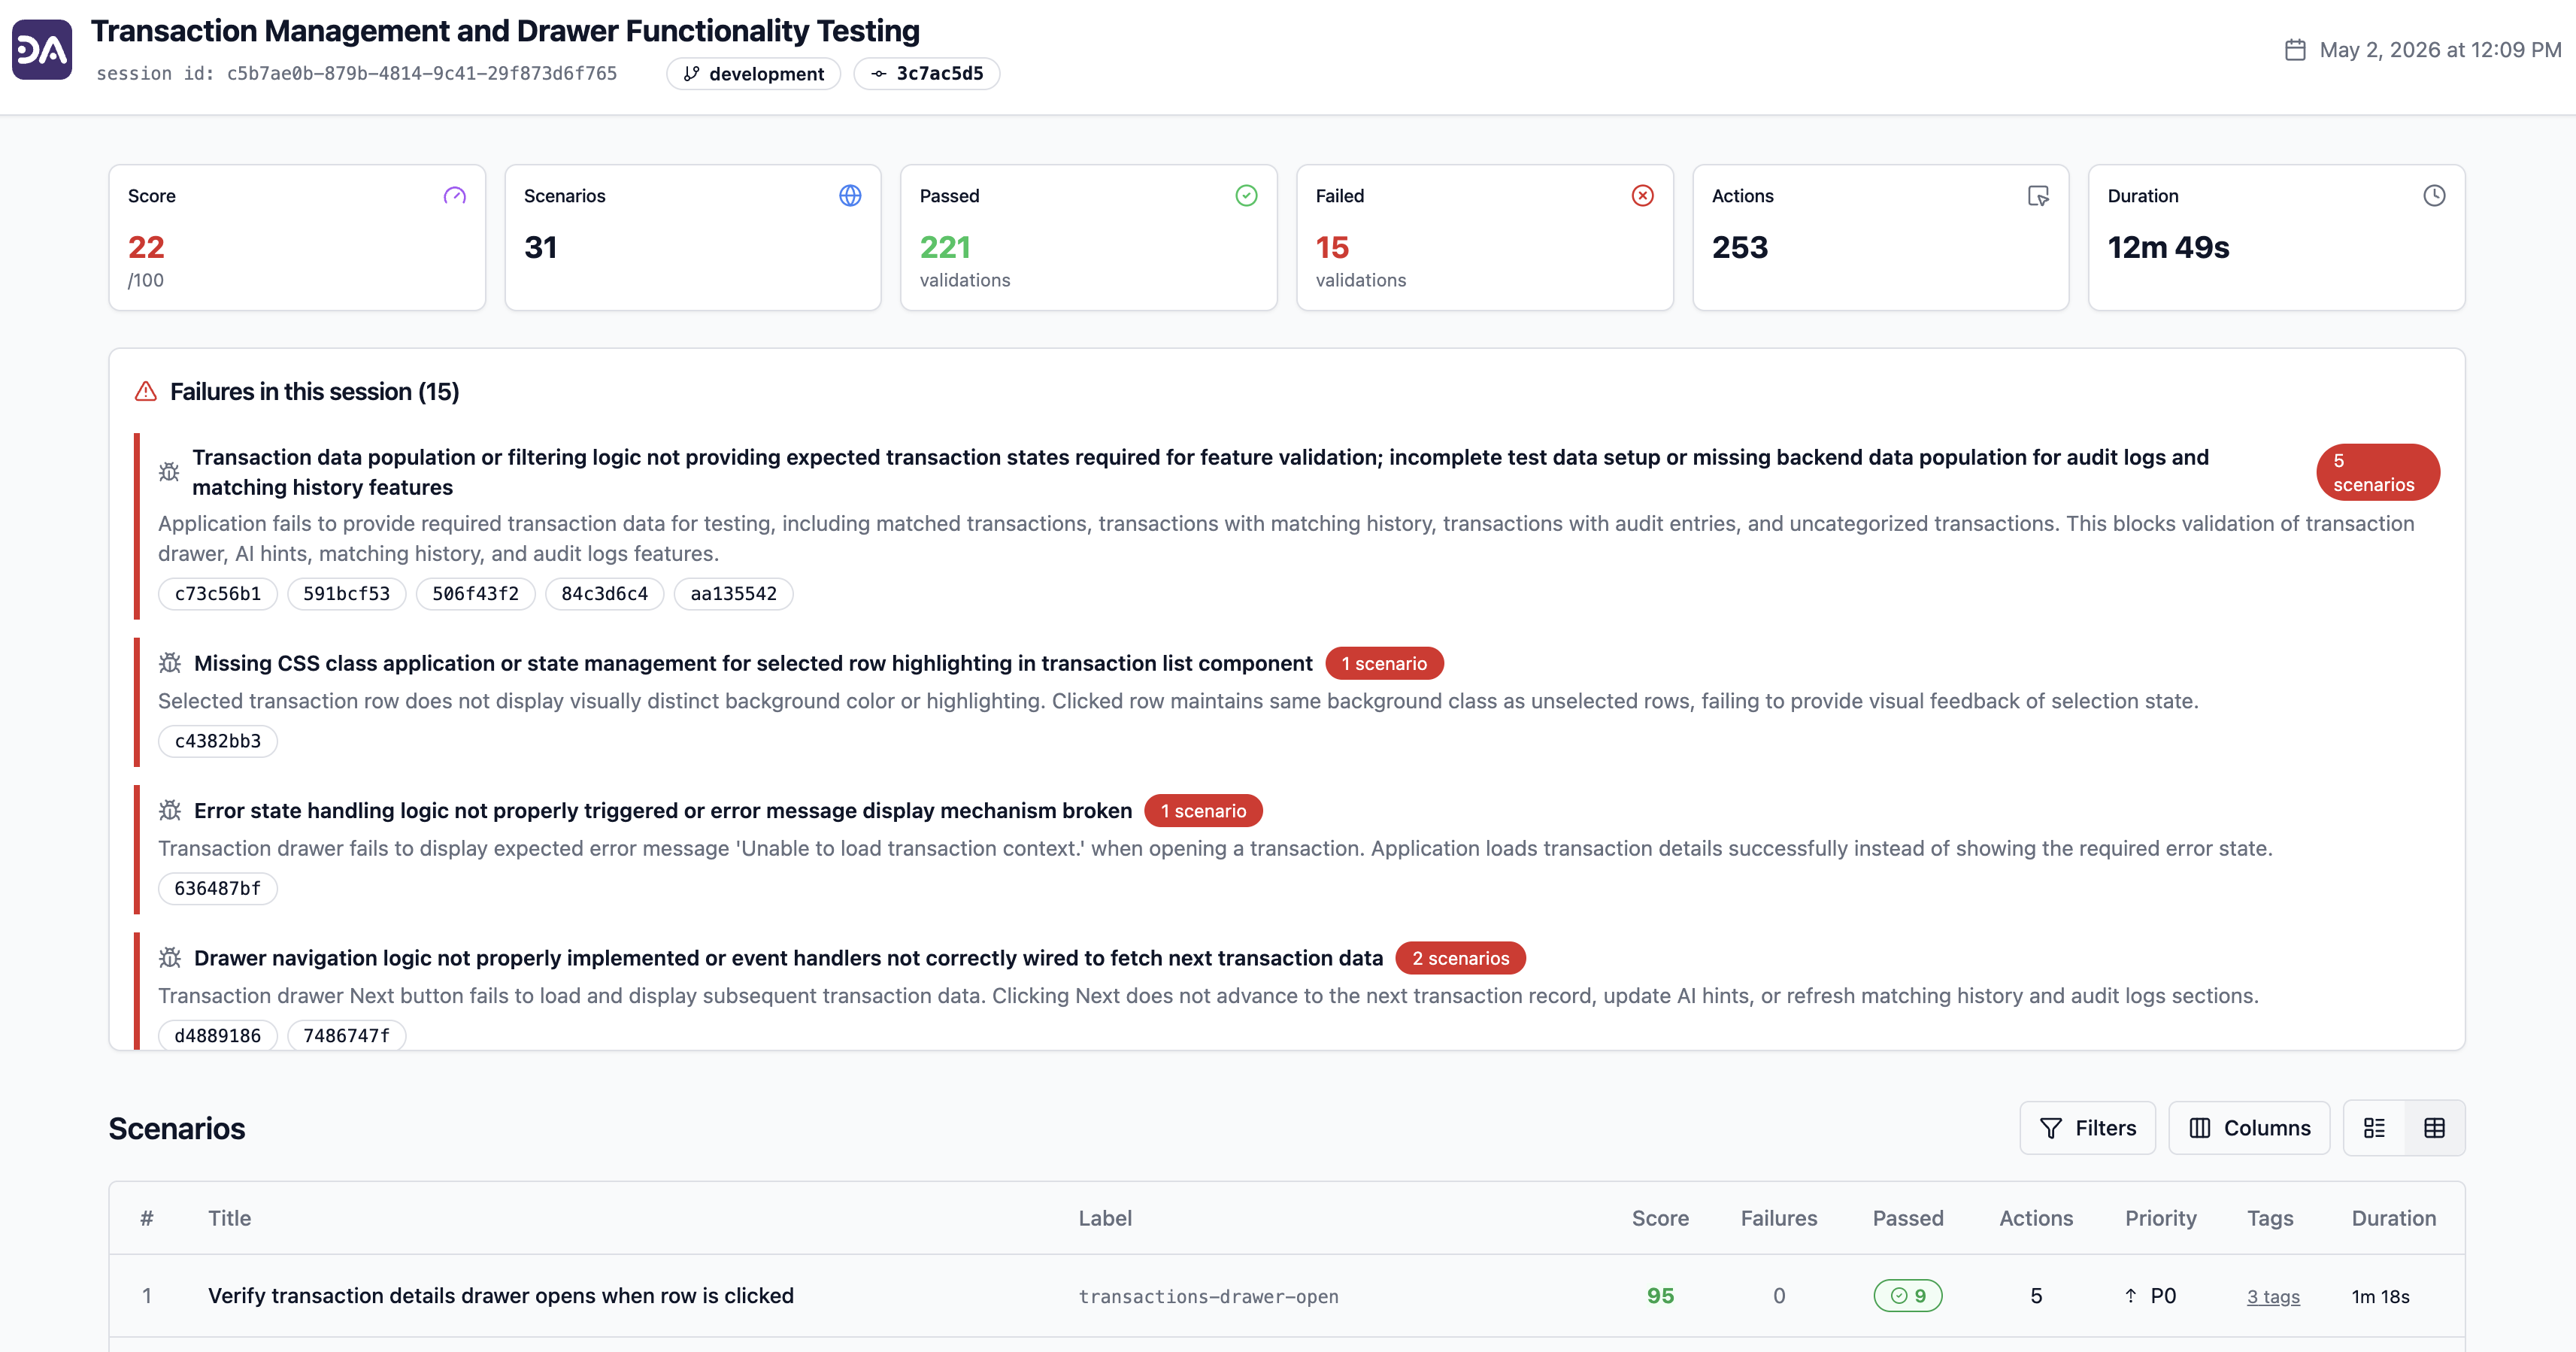
You review the diff. The agent reviews the behavior.
Step 4: Make the check required (recommended)
To turn Vibe Testing from informational into a real merge gate:
- Go to Settings → Branches → Branch protection rules for
main. - Add or edit the rule.
- Under Require status checks to pass before merging, search for and select DevAssure O2.
- Save.
From this point on, no PR can merge to main until the agent's check passes. AI-generated code, hand-written code, refactors — all gated by the same automated validation.
GitHub's branch protection documentation covers the full options if your org uses rulesets or required reviewers alongside status checks.
Step 5: (Optional) Add the Cursor or VS Code extension for instant feedback
CI feedback arrives within roughly thirty minutes of opening a PR. For tighter loops while coding, install the IDE extension:
- Cursor — DevAssure on Open VSX
- VS Code — DevAssure on the VS Code Marketplace
The extension runs git-aware tests from the editor sidebar before you push. Same agent, same coverage logic, faster feedback. Both stages — extension and Action — use the same backend, so there is no duplicate test maintenance.
For Cursor-specific workflows, see How to Test Cursor-Generated Code.
What happens if I want to write some tests manually?
You can, and a lot of teams do for high-value flows they want explicit control over.
Place YAML files in a .devassure/tests/ directory in your repo:
# .devassure/tests/signup.yaml
summary: Signup form validation
priority: P0
steps:
  - open app url
  - open signup page
  - enter all mandatory fields
  - leave email field empty
  - click SignUp button
  - verify signup is not successful
  - verify error message is shown
tags: [ux, signup, form]
The agent runs these alongside its auto-generated tests. No framework to learn — if you can describe the test to a teammate, you can write it. When the UI changes, the agent adapts the execution path; you never touch the YAML again.
The mental model: the agent handles coverage by default; you author the cases you want pinned in version control.
How to verify the setup is working
A quick three-point check:
If any of these fail, the most common causes are:
fetch-depth: 0missing from the checkout step (diff cannot be computed)DEVASSURE_TOKENnot set or set in the wrong scope (action cannot authenticate)- The staging URL the agent should hit is not reachable from GitHub-hosted runners (consider self-hosted runners or a public preview environment)
How much does Vibe Testing actually save?
Reported outcomes from teams using DevAssure O2:
| Metric | Result |
|---|---|
| Test scripts to write/maintain | ~0 |
| QA hours saved per month | 128 |
| Reliable test runs (non-flaky) | 100% |
| Faster validated releases | 2× |
The pattern across teams: engineering hours that used to be spent writing and fixing tests get redirected to shipping features, and defect-escape rates drop because every PR gets coverage instead of every sprint.
How Vibe Testing changes day-to-day workflow
| Activity | Before | After |
|---|---|---|
| Writing new tests | Every feature, manually | Auto-generated from diffs |
| Maintaining selectors | Every UI change | Agent self-heals |
| Debugging flaky tests | Every sprint | Not a category anymore |
| QA approval | Bottleneck | Concurrent with code review |
| AI-generated PRs | Ship without validation | Same gate as everything else |
| Test suite size | Grows slower than features | Tracks features automatically |
The clearest signal that Vibe Testing is working: nobody on the team is opening a "fix flaky tests" ticket at the start of each sprint.
Frequently asked questions
About two minutes. Add the workflow file, set the DEVASSURE_TOKEN secret, open a PR. No frameworks to install, no browser binaries to provision.
The bottom line
Setting up Vibe Testing is one workflow file. After that, every PR — human-written or AI-generated — gets E2E coverage automatically, with no scripts to maintain.
If you are already using AI to write code, the matching automation on the validation side closes the loop. Build with AI. Test with AI. Ship without fear.
Start here:
- Add the DevAssure GitHub Action
- Install the Cursor extension for IDE-side feedback
- Sign up for the free tier at app.devassure.io/sign_up
Free tier. Two-minute setup. No credit card.
Links
- Automatically test every PR (without writing tests): https://www.devassure.io/blog/automatically-test-every-pull-request/
- What is Vibe Testing: https://www.devassure.io/blog/vibe-testing/
- How to test Cursor-generated code: https://www.devassure.io/blog/how-to-test-cursor-generated-code/
- O2 PR testing agent: https://www.devassure.io/o2-testing-agent
- DevAssure CLI (docs): https://www.devassure.io/docs/DevAssure/01_Invisible%20Agent/02_CLI/GetStarted
- DevAssure O2 on GitHub Marketplace: https://www.devassure.io/blog/devassure-o2-agent-github-marketplace/
- GitHub Actions guide: https://www.devassure.io/blog/github-actions/
- The quiet death of the test script: https://www.devassure.io/blog/quiet-death-of-the-test-script/
- Security and privacy: https://www.devassure.io/Privacy/
- DevAssure: https://www.devassure.io